Few things are as frustrating as reaching for a spray bottle, whether it’s for cleaning, gardening, or a DIY project, only to find it sputters, drips, or worse – doesn’t spray at all. A clogged spray nozzle can bring your tasks to a screeching halt, wasting both time and product. But don’t despair! Often, the solution is simpler than you think, and a common household item like a safety pin can be your unexpected hero.
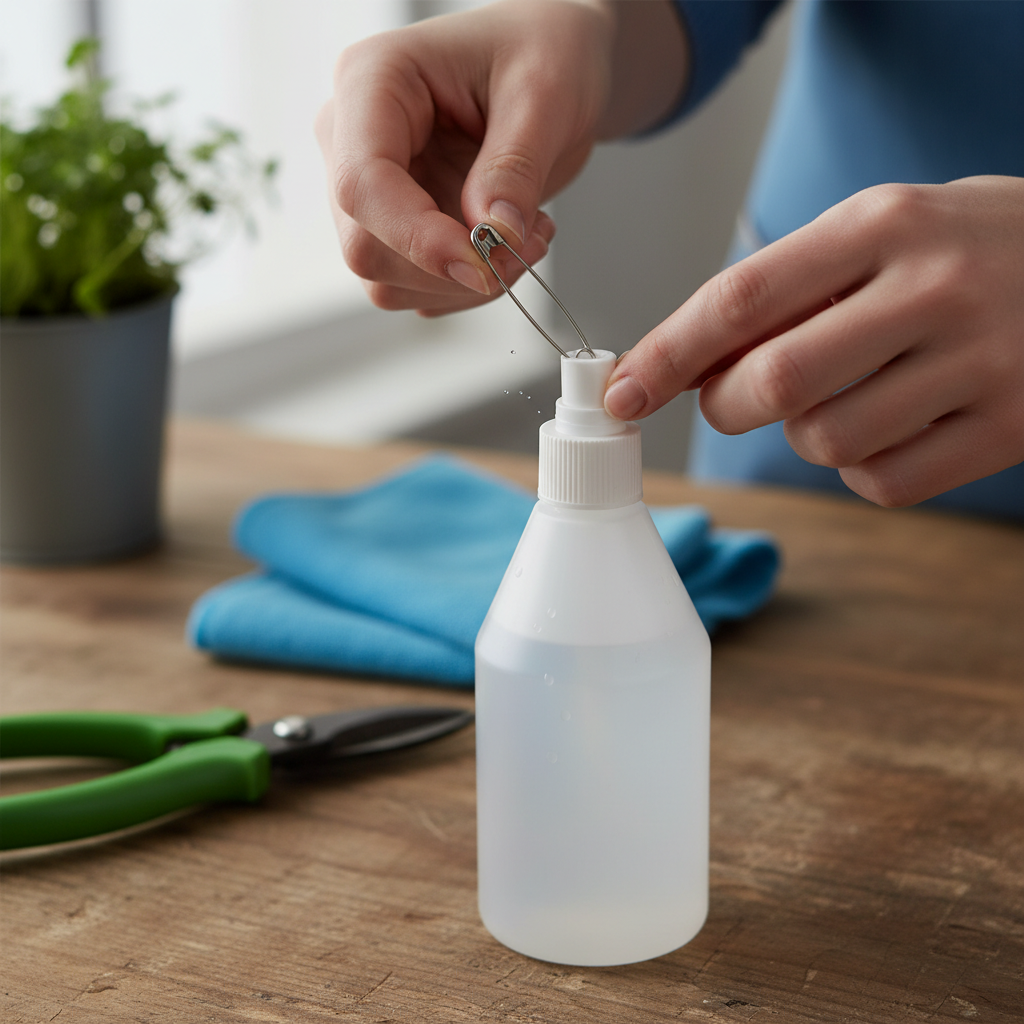
This comprehensive guide will walk you through the precise steps to diagnose and clear those stubborn clogs, with a special focus on the effective safety pin method. We’ll also delve into why spray nozzles clog, how to prevent future blockages, and when it might be time to replace a truly worn-out component. Get ready to restore that perfect mist and get back to your projects with ease.
Understanding Clogged Spray Nozzles: Causes and Symptoms
Before you dive into fixing a clogged spray nozzle, it helps to understand what causes these frustrating blockages and how to identify them. Knowing the root cause can guide your cleaning efforts and help prevent recurrence.
Spray nozzles are designed with tiny orifices to atomize liquid into a fine mist or targeted stream. Over time, these small openings can become obstructed by various substances. Common culprits include:
- Residue Buildup: This is perhaps the most frequent cause. Liquids like cleaning solutions, paints, hairsprays, or even sticky food products can dry and harden inside the nozzle, creating a blockage.
- Hard Water Mineral Deposits: If you live in an area with hard water, calcium and magnesium deposits can accumulate within the nozzle, gradually narrowing the spray opening and eventually leading to a complete clog.
- Particulate Contamination: Dirt, dust, sand, rust flakes from pipes, or other small debris can easily get trapped in the narrow channels of the nozzle, obstructing the flow.
- Improper Maintenance: Neglecting to rinse or clean nozzles after using certain products can lead to hardened residue that’s difficult to remove later.
- Worn or Damaged Nozzles: Physical wear and tear can deform the nozzle opening, making it more prone to trapping debris and causing inconsistent spray patterns.
Identifying a clog is usually straightforward. You might experience an uneven spray pattern, a weak or sputtering output, or a complete absence of spray. Sometimes, liquid may even leak from around the nozzle’s base as pressure builds up behind the blockage. Visible crusty residue or discoloration on the nozzle tip is another clear indicator.
Tools You’ll Need to Unclog a Spray Nozzle
Before you begin the unclogging process, gather a few essential tools. Having these items on hand will make the job quicker, safer, and more effective. You likely already have most of them in your home.
Here’s what you’ll need:
- A Safety Pin or Sewing Needle: This is your primary tool for physically dislodging debris from the tiny spray hole. Ensure it’s thin enough to fit without enlarging the orifice. A thin wire can also work.
- Warm Water and Mild Soap: Warm water helps to loosen general residue, while soap can cut through grease and sticky substances.
- White Vinegar or Rubbing Alcohol: These solutions are excellent for dissolving mineral deposits from hard water or more stubborn organic buildup.
- Small Brush (e.g., an old toothbrush): Useful for scrubbing away external gunk and internal residue after soaking.
- Small Container or Bowl: For soaking the nozzle.
- Paper Towels or a Clean Cloth: For drying and wiping.
- Personal Protective Equipment (PPE) (Optional but Recommended): If you suspect the nozzle has been used with harsh chemicals, wear gloves and eye protection to prevent skin or eye irritation.
With your tools ready, you’re prepared to tackle that stubborn clog head-on.
Step-by-Step Guide: Unclogging Spray Nozzles with a Safety Pin
This method is highly effective for many types of spray nozzles, particularly those found on household cleaners, garden sprayers, and even some aerosol cans. Follow these steps carefully to clear the blockage without damaging your nozzle.
Step 1: Prioritize Safety
|
Our Picks for the Best High pressure faucet in 2026
As an Amazon Associate I earn from qualifying purchases.
|
||
| Num | Product | Action |
|---|---|---|
| 1 | FORIOUS Kitchen Faucets with Pull Down Sprayer, Brushed Nickel, High Arc Single Handle Classic Stainless Steel Sink Faucet 1 or 3 Hole, Suitable for Farmhouse Camper Laundry Rv Bar |

|
| 2 | TIORIY Kitchen Faucet Head with 15 Adapters, High Pressure 3 Functions Pull Down Kitchen Spray Head Replacement, Pull Out Kitchen Sink Sprayer Nozzle, Brushed Gold, ABS |
|
| 3 | AIMADI Kitchen Faucet with Pull Down Sprayer,Commercial Stainless Steel Pull Down Sprayer Kitchen Faucet Single Hole Single Handle RV Laundry Outdoor Kitchen Sink Faucets |
|
| 4 | Chrome Brass Wall Mount Faucet, Single Cold Water Utility Tap, G 1/2 Inch Connection for Laundry Sink, Mop Basin, Garage, Outdoor Garden Hose |
|
| 5 | Kitchen Faucet with Pull Down Sprayer, High Arc Single Handle Brushed Nickel Stainless Steel 1 or 3 Hole Faucet for Kitchen Sink, Farmhouse, RV, Laundry, Bar, Outdoor |
|
| 6 | 2PCS 360 Degree Swivel Faucet Aerator Deluxe Water Saving Faucet Sprayer Water Saving Bubbler Pressurized Faucet Filter Kitchen Accessories (360 Degree, Count, 2) |
|
| 7 | Inchant Outdoor Kitchen Sink Faucet - 360° Rotatable Single Hole Single Handle Cold Water Kitchen Faucet Flexible Neck Laundry Room Tap Bar Garden Outdoor Faucet, Deck Mount Chrome Finish |
|
| 8 | GIMILI Kitchen Faucet with Pull Down Sprayer Single Handle High Pressure Kitchen Sink Faucet Commercial Double-Headed Stainless Steel Kitchen Faucets Brushed Nickel and Black |
|
| 9 | TMOK 1/2" x 3/4" Brass Outdoor Faucet & High Pressure Jet Nozzle with Leakproof Shut Off Valve, Heavy-Duty Brass 3/4" GHT Hose Nozzle with 4 Garden Hose Rubber Washers, Teflon Tape |
|
| 10 | 3-Adjustable Water Pressure Faucet with Booster Shower Heads - ABS Material, Extended Spout, Anti-Splash, Universal Connector |
|
If the spray bottle contains chemicals, always wear gloves and eye protection. Ensure the device is turned off and disconnected if it’s an electric sprayer. If it’s an aerosol can, make sure you’re working in a well-ventilated area.
Step 2: Remove the Nozzle
Carefully detach the nozzle from the bottle or can. For most spray bottles, this involves unscrewing the trigger assembly. For aerosol cans, the spray button usually pulls straight off. Removing the nozzle provides better access and prevents accidental spraying of the product while you’re cleaning.
Step 3: Initial Rinse with Warm Water
Hold the detached nozzle under warm running water. Allow the water to flow through the nozzle opening from both directions (if possible). This initial rinse can often dislodge loose debris and soften any surface residue. If you see a lot of gunk, gently rub it with your fingers.
Step 4: The Safety Pin Method
Now, grab your safety pin or sewing needle. Locate the tiny spray hole at the very tip of the nozzle. Gently insert the pointy end of the pin into the hole. Twist and wiggle the pin carefully to dislodge any dried material, mineral deposits, or debris that might be blocking the opening. Be cautious not to force the pin or scrape too aggressively, as this could widen the hole or damage the nozzle’s delicate mechanism, affecting its spray pattern permanently. Repeat this action several times, then rinse the nozzle again under warm water to flush out any loosened particles.
Step 5: Soak in a Cleaning Solution
For more stubborn clogs, especially those caused by hard water or sticky residues, a targeted soak is necessary. Fill a small bowl with warm water and add a few drops of mild dish soap, or for mineral deposits, use white vinegar or rubbing alcohol. Immerse the nozzle completely in the solution and let it soak for 15 to 20 minutes. Vinegar is particularly effective against calcium buildup, while rubbing alcohol can help dissolve sticky resins or dried paint.
Step 6: Scrub and Rinse Thoroughly
After soaking, use a small brush, like an old toothbrush, to gently scrub the exterior of the nozzle and any accessible internal parts. Pay close attention to the spray hole and any other small crevices where residue might hide. Once you’re satisfied, rinse the nozzle thoroughly under clean running water, ensuring all cleaning solution and loosened debris are completely flushed away.
Step 7: Reassemble and Test
Once the nozzle is clean and dry, reattach it to the bottle or can. If you removed it from a spray bottle, ensure the dip tube is securely reconnected to the pump mechanism. Test the sprayer, preferably with plain water first, to confirm that the clog has been successfully cleared and the spray pattern is consistent.
Beyond the Safety Pin: Other Unclogging Techniques
While the safety pin method is highly effective, sometimes a clog might require a different approach or a combination of techniques. Expanding your toolkit of solutions can help you tackle various types of blockages.
One common alternative is soaking the entire nozzle assembly in warm, soapy water. This can be particularly useful for spray bottles where the clog might be deeper within the pump mechanism or the dip tube. After soaking for an hour or even overnight, vigorously pump warm water through the nozzle until the clog clears. For continuous mist spray bottles, immersing the trigger and dip tube assembly in hot water and then pumping it can often dislodge internal blockages.
Another method involves checking the dip tube, especially for standard trigger spray bottles. Sometimes, the tube inside the bottle that draws liquid up can become disconnected from the nozzle mechanism or be blocked at its base. If the sprayer feels easy to press but no liquid comes out, a disconnected dip tube might be the issue. Reattaching it firmly can instantly resolve the problem.
For minor obstructions or to give an extra push after using a pin, you can also try gently blowing compressed air (from a can of compressed air or even forcefully with your mouth) into the nozzle opening from both ends. This can help dislodge any remaining loose particles. However, exercise caution with compressed air, as excessive force could potentially damage delicate internal components.
Remember to always rinse thoroughly after any cleaning method to remove residual cleaning agents, especially if the bottle will be used for sensitive applications like plant care or food prep.
Preventing Future Clogs: Best Practices for Spray Nozzle Maintenance
The best way to deal with a clogged spray nozzle is to prevent it from happening in the first place. Incorporating a few simple maintenance habits into your routine can significantly extend the life and efficiency of your sprayers.
- Rinse After Every Use: This is perhaps the most crucial tip, especially for bottles used with paints, glues, thick liquids, or harsh chemicals. After each use, empty any remaining product, fill the bottle with clean warm water, and spray until only clear water comes out. This flushes out residues before they have a chance to dry and harden.
- Use Filtered Water: If you’re using water in your spray bottles, particularly for gardening or humidifiers, consider using filtered or distilled water. This helps prevent the accumulation of hard water mineral deposits that are a common cause of clogs.
- Store Properly: When not in use, store spray bottles with the nozzle cap on (if applicable) or in a dry, clean environment to protect them from dust and grime. For aerosol cans, briefly invert and spray after use to clear any paint or product from the nozzle, then store upright.
- Regular Deep Cleaning: Even with routine rinsing, a periodic deep clean can be beneficial. Every few weeks or months, depending on usage, remove the nozzle and give it a thorough cleaning with warm soapy water and a vinegar soak as described in the unclogging steps.
- Inspect and Replace: Regularly inspect your nozzles for signs of wear, cracks, or permanent blockage. A worn nozzle is more prone to clogging and won’t spray as effectively. Don’t hesitate to replace it if it’s showing its age.
- Choose High-Quality Nozzles: When purchasing new spray bottles or replacement parts, invest in high-quality options. Many premium nozzles are designed with clog-resistant features and are made from more durable materials, offering better longevity and consistent performance.
By adopting these preventative measures, you’ll spend less time troubleshooting and more time enjoying perfectly functioning sprayers.
When to Replace Your Spray Nozzle
While many clogged spray nozzles can be revived with a good cleaning and a safety pin, there comes a point when replacement is the most practical and efficient solution. Recognizing when to let go can save you frustration and ensure optimal performance for your tasks.
Consider replacing your spray nozzle if:
- Frequent Clogging Persists: If you find yourself constantly unclogging the same nozzle, despite regular cleaning and maintenance, it’s a strong indicator that internal components might be irreversibly damaged or worn.
- Visible Wear and Tear: Inspect the nozzle for any cracks, chips, or deformities in the spray orifice. Even small physical damages can alter the spray pattern, make it more susceptible to clogs, or cause leaks that no amount of cleaning can fix.
- Altered Spray Pattern: A nozzle that consistently produces an uneven, weak, or distorted spray, even after a thorough cleaning, suggests that the internal mechanism or the spray hole itself has been permanently compromised. It might be spraying a jet instead of a mist, or a stream might be crooked.
- Cleaning Solutions Are Ineffective: If soaking in strong cleaning agents like vinegar or rubbing alcohol, combined with physical clearing, yields no improvement, the clog might be too deeply embedded or the material causing it is resistant to common solvents.
- Pump Mechanism Failure: For trigger spray bottles, sometimes the pump itself fails to create sufficient pressure, irrespective of the nozzle’s cleanliness. If you can hear the pump working but no liquid is drawn up, or it feels unusually loose, the issue might be internal to the pump rather than just the nozzle opening.
Ultimately, a functional spray nozzle is key to efficient application. While a safety pin is a fantastic first line of defense, knowing when to replace a nozzle ensures you maintain peak performance and avoid unnecessary headaches. Investing in a new, high-quality nozzle can often be a cost-effective solution in the long run.
Frequently Asked Questions
Why does my spray nozzle clog so easily?
Spray nozzles often clog due to dried residue from the liquid being sprayed, mineral deposits from hard water, or small particles like dirt and rust accumulating in the tiny spray orifice. Infrequent cleaning is a major contributor to these blockages.
Can I use anything else besides a safety pin to unclog a spray nozzle?
Yes, you can use other thin, rigid objects like a sewing needle, a paperclip (unbent), or a thin piece of wire. The key is to find something small enough to fit into the nozzle hole without forcing it or causing damage.
Is it safe to use harsh chemicals to clean a clogged nozzle?
While some clogs respond well to white vinegar or rubbing alcohol, avoid extremely harsh chemicals unless specifically recommended for the nozzle material. Always wear appropriate personal protective equipment (gloves, eye protection) and ensure good ventilation when using any cleaning solution.
How often should I clean my spray nozzles?
The frequency depends on what you’re spraying. For water or mild solutions, a rinse after use and a monthly deep clean might suffice. For paints, adhesives, or corrosive chemicals, it’s best to rinse thoroughly immediately after every use to prevent buildup.
What if my spray bottle isn’t clogged but still won’t spray?
If the nozzle isn’t clogged, check the dip tube inside the bottle to ensure it’s securely attached to the pump mechanism and isn’t obstructed at the bottom. The pump itself might also be faulty, or the bottle might be low on product, causing air to be drawn instead of liquid.