Tired of trickling faucets and weak shower sprays? Low water pressure can turn daily routines into frustrating chores. Whether you’re dealing with sluggish dishwashwashers or a less-than-invigorating morning shower, an under-sink pressure booster pump can be a game-changer, providing that much-needed boost right where you need it most. This comprehensive guide will walk you through everything you need to know, from understanding what these pumps do to a detailed, step-by-step installation process, helping you achieve consistent, powerful water flow in your home.
What is an Under-Sink Pressure Booster Pump?
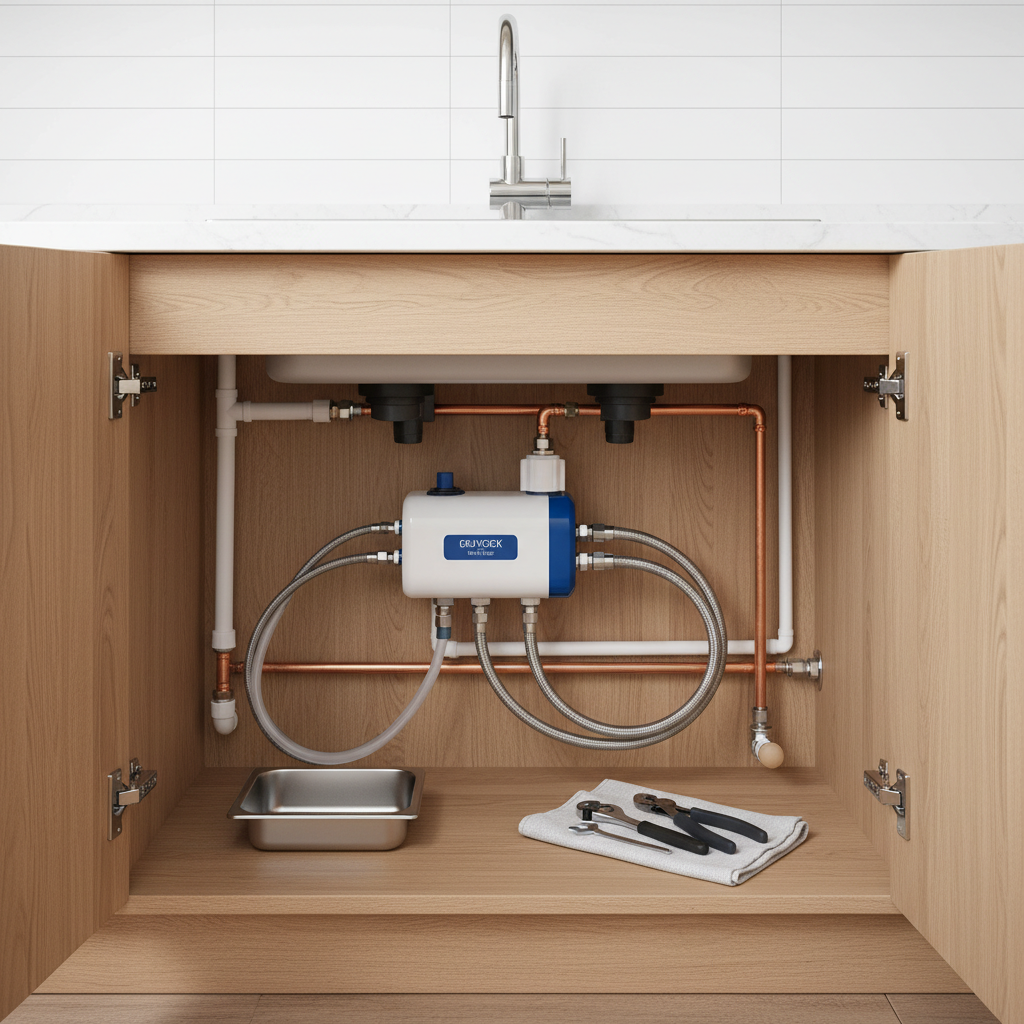
An under-sink pressure booster pump is a compact plumbing device designed to increase the water pressure and flow rate to a specific fixture or localized area in your home, such as a kitchen faucet, bathroom sink, or even a single shower. Unlike whole-house booster pumps, these smaller units target a particular point of use, making them ideal for addressing isolated low-pressure issues without impacting the entire plumbing system.
The principle behind their operation is straightforward: the pump draws water from your existing supply line and uses an electric motor to accelerate the water, pushing it out at a higher pressure. This effectively counteracts low municipal supply pressure or pressure loss due to elevation changes and long pipe runs. The benefits are immediate and noticeable, including optimized shower and faucet pressure, enhanced performance of water-reliant appliances like dishwashers and washing machines, and an overall improvement in your daily water usage experience.
Choosing the Right Under-Sink Booster Pump
Selecting the ideal under-sink booster pump involves considering several key factors to ensure it meets your specific needs and integrates seamlessly with your plumbing.
First, assess your existing water pressure and flow rate. Use a water pressure gauge at the tap where you experience issues. Knowing your baseline helps determine how much of a boost you need. Next, consider the flow rate requirements of the fixtures you intend to supply. A pump’s GPM (gallons per minute) rating should match or exceed the combined demand of these fixtures.
Pump type is also crucial for under-sink applications. Many compact models are designed specifically for this purpose, sometimes featuring integrated pressure switches and smaller expansion tanks. Look for variable-speed pumps if you desire consistent pressure regardless of demand, as they adjust motor speed to maintain a steady flow, often leading to quieter operation and energy efficiency. Given the under-sink location, noise level is a significant consideration; opt for models advertised as quiet.
Finally, ensure the pump’s power requirements are compatible with your existing electrical outlet and that it uses durable, corrosion-resistant materials like stainless steel or high-grade plastics for longevity. Always check the manufacturer’s reputation and warranty for peace of mind.
Tools and Materials Required for Installation
Before you begin, gather all the necessary tools and materials to ensure a smooth and efficient installation process. Having everything at hand will prevent interruptions and make the job much easier.
Here’s a list of what you’ll typically need:
- Under-Sink Pressure Booster Pump: The unit itself, along with its instruction manual.
- Adjustable Wrenches: For tightening pipe connections.
- Pipe Cutters or Hacksaw: If you need to modify existing copper or PEX piping.
- Teflon Tape (PTFE Tape): For sealing threaded pipe connections to prevent leaks.
- Flexible Water Hoses: Often included with the pump or purchased separately to connect the pump to your existing water lines. Ensure they have the correct fittings (e.g., 3/8-inch, 1/2-inch).
- Shut-off Valves (Optional but Recommended): To isolate the pump for future maintenance without turning off the main water supply.
- Check Valve (Optional but Recommended): Prevents backflow of water into the main supply (some pumps have this integrated).
- Bucket and Towels: For catching any residual water during pipe disconnections.
- Spirit Level: To ensure the pump is mounted securely and level.
- Screwdriver or Drill: For mounting brackets.
- Pressure Gauge: To verify water pressure before and after installation.
- Safety Glasses and Gloves: For personal protection.
- Flashlight: To illuminate the tight under-sink space.
Pre-Installation Checklist
A thorough pre-installation checklist is vital for a safe and successful booster pump setup.
Start by reading the manufacturer’s installation manual thoroughly. This document provides pump-specific instructions, warnings, and diagrams that are crucial for correct setup. Next, locate and turn off your home’s main water supply valve to prevent flooding during the installation process. Open the nearest faucet to drain any remaining water from the lines, reducing spills.
Inspect your existing plumbing for any signs of corrosion, damage, or leaks that might need addressing before connecting the pump. Finally, select the ideal under-sink location. This spot should be dry, easily accessible for future maintenance, and have a solid, level surface for mounting to minimize vibration and noise. Crucially, ensure a grounded electrical outlet is within reach for the pump’s power supply. Taking these preparatory steps will lay a solid foundation for your new pump.
How to Install and Use Your Under-Sink Pressure Booster Pump
Installing an under-sink pressure booster pump can be a manageable DIY project if you follow these steps carefully. However, if you are uncomfortable with any step, especially electrical connections, consult a licensed professional.
Step 1: Prepare the Under-Sink Area
|
Our Picks for the Best High pressure faucet in 2026
As an Amazon Associate I earn from qualifying purchases.
|
||
| Num | Product | Action |
|---|---|---|
| 1 | Kitchen Faucet with Pull Down Sprayer, High Arc Single Handle Brushed Nickel Stainless Steel 1 or 3 Hole Faucet for Kitchen Sink, Farmhouse, RV, Laundry, Bar, Outdoor |

|
| 2 | TIORIY Kitchen Faucet Head with 15 Adapters, High Pressure 3 Functions Pull Down Kitchen Spray Head Replacement, Pull Out Kitchen Sink Sprayer Nozzle, Brushed Gold, ABS |
|
| 3 | GIMILI Kitchen Faucet with Pull Down Sprayer Single Handle High Pressure Kitchen Sink Faucet Commercial Double-Headed Stainless Steel Kitchen Faucets Brushed Nickel and Black |
|
| 4 | 2PCS 360 Degree Swivel Faucet Aerator Deluxe Water Saving Faucet Sprayer Water Saving Bubbler Pressurized Faucet Filter Kitchen Accessories (360 Degree, Count, 2) |
|
| 5 | Inchant Outdoor Kitchen Sink Faucet - 360° Rotatable Single Hole Single Handle Cold Water Kitchen Faucet Flexible Neck Laundry Room Tap Bar Garden Outdoor Faucet, Deck Mount Chrome Finish |
|
| 6 | AIMADI Kitchen Faucet with Pull Down Sprayer,Commercial Stainless Steel Pull Down Sprayer Kitchen Faucet Single Hole Single Handle RV Laundry Outdoor Kitchen Sink Faucets |
|
| 7 | FORIOUS Kitchen Faucets with Pull Down Sprayer, Brushed Nickel, High Arc Single Handle Classic Stainless Steel Sink Faucet 1 or 3 Hole, Suitable for Farmhouse Camper Laundry Rv Bar |
|
| 8 | 3-Adjustable Water Pressure Faucet with Booster Shower Heads - ABS Material, Extended Spout, Anti-Splash, Universal Connector |
|
| 9 | Chrome Brass Wall Mount Faucet, Single Cold Water Utility Tap, G 1/2 Inch Connection for Laundry Sink, Mop Basin, Garage, Outdoor Garden Hose |
|
| 10 | TMOK 1/2" x 3/4" Brass Outdoor Faucet & High Pressure Jet Nozzle with Leakproof Shut Off Valve, Heavy-Duty Brass 3/4" GHT Hose Nozzle with 4 Garden Hose Rubber Washers, Teflon Tape |
|
Begin by clearing out the cabinet under your sink to provide ample working space. Ensure the surface where the pump will sit is clean, dry, and perfectly level. A non-uniform surface can cause excessive noise and vibration, potentially shortening the pump’s lifespan. If needed, install a small shelf or a sturdy platform to create a stable base for the pump.
Step 2: Install Shut-off Valves and Check Valve
It’s highly recommended to install a shut-off valve on both the inlet and outlet sides of the pump. This allows you to isolate the pump for maintenance or replacement without disrupting your home’s entire water supply. Additionally, if your pump does not have one built-in, install a check valve on the inlet side. This one-way valve prevents boosted water from flowing back into the main supply line when the pump is off, protecting your plumbing. Apply Teflon tape to all threaded connections to ensure a watertight seal.
Step 3: Connect Inlet and Outlet Hoses
Connect the flexible water hoses from your existing cold water line to the pump’s inlet port, and another hose from the pump’s outlet port to your faucet’s cold water supply line. Use adjustable wrenches to tighten all connections securely, but avoid over-tightening, which can damage fittings. Ensure there are no kinks in the hoses that could restrict water flow. Double-check that Teflon tape has been applied to all threaded joints.
Step 4: Mount the Booster Pump
Securely mount the booster pump to the under-sink cabinet floor or wall using the provided brackets and hardware. A stable foundation is key to minimizing noise and vibration during operation. Use a spirit level to confirm the pump is perfectly level before tightening all mounting screws. This stability not only reduces operational noise but also contributes to the longevity of the pump and connected pipes.
Step 5: Connect Electrical Power
This step requires careful attention to safety. Connect the pump to a grounded electrical outlet. Many under-sink pumps come with a standard plug, making this connection straightforward. However, always ensure the circuit can handle the pump’s electrical load. If you need to install a new outlet or are unsure about your home’s electrical capacity, always consult a licensed electrician to ensure compliance with local electrical codes and for your safety.
Step 6: Test the System for Leaks and Functionality
Once all connections are made and the pump is securely mounted, slowly open the main water supply valve. With the water supply fully restored, open the shut-off valves for the pump. Carefully inspect all pipe connections for any signs of leaks. Tighten any dripping connections gently. Now, plug in the pump and turn on your faucet. The pump should activate, and you should observe a noticeable increase in water pressure. Listen for any unusual noises and ensure the pump cycles on and off as expected, indicating proper operation.
Maintenance Tips for Your Under-Sink Booster Pump
Regular maintenance is key to ensuring your under-sink pressure booster pump operates efficiently and extends its lifespan. Perform periodic visual inspections, checking all connections for potential leaks or corrosion. Keep the area around the pump clear of clutter to ensure proper ventilation and easy access for future servicing. Many pumps include a small filter or strainer on the inlet side; check and clean this filter regularly to prevent blockages that can reduce efficiency. Occasionally, monitor your water pressure with a gauge to ensure the pump is maintaining its intended performance. While under-sink pumps typically don’t require winterization like outdoor units, ensure the area remains above freezing temperatures.
Troubleshooting Common Under-Sink Booster Pump Issues
Even with proper installation and maintenance, issues can arise. Here are solutions to common problems:
- Pump Not Activating: First, check the power supply and ensure the pump is plugged into a functional, grounded outlet. Verify that all shut-off valves are fully open. If the water pressure is still too low, the pump’s pressure switch might need adjustment (refer to the manual) or replacement.
- Rapid Cycling: If your pump turns on and off frequently, this often indicates a leak in the system, a faulty check valve, or an issue with the pressure tank (if separate). Inspect all plumbing for drips and ensure the check valve is working correctly. A professional plumber can diagnose pressure tank issues.
- Unusual Noise: While some operational noise is normal, excessive or new noises (grinding, squealing) can signal a problem. Ensure the pump is securely mounted and level to rule out vibration. Air in the lines can also cause gurgling sounds; bleeding the system can help. Otherwise, internal component wear might require professional attention.
- Reduced Pressure Despite Pump Operation: This could be due to a clogged filter on the pump’s inlet, scale buildup in your pipes, or a partially closed shut-off valve. Check and clean the filter, and consider descaling your plumbing if buildup is a recurring issue.
When to Call a Professional
While installing an under-sink pressure booster pump can be a DIY project, there are specific situations where calling a licensed professional is the safest and most effective course of action. Any work involving electrical wiring beyond plugging into an existing outlet, such as installing a new circuit or outlet, should always be handled by a qualified electrician to ensure safety and compliance with local codes. If you encounter complex plumbing alterations or if your existing pipes are old, corroded, or made of unfamiliar materials, a plumber can ensure secure, leak-free connections. Furthermore, if you’ve followed all troubleshooting steps and are still experiencing persistent issues with your pump or water pressure, a professional can accurately diagnose underlying problems that might extend beyond the pump itself. When in doubt, prioritize safety and professional expertise.
Conclusion
Installing an under-sink pressure booster pump is a practical and effective solution to combat low water pressure, significantly improving your daily water usage experience. By carefully following the steps outlined in this guide – from selecting the right pump and preparing your workspace to making secure connections and performing final tests – you can achieve consistent, strong water flow right at your faucet. Remember to always consult your pump’s manual and local building codes, and don’t hesitate to call a professional for electrical work or complex plumbing challenges. With a bit of effort, you can transform your frustrating dribble into a satisfying stream.
“A well-installed booster pump is more than just added pressure; it’s about reclaiming efficiency and comfort in your home’s water system.” – Alex Chen, Plumbing Systems Engineer
Are you ready to say goodbye to low water pressure for good?
Frequently Asked Questions
How much pressure can an under-sink booster pump add?
Under-sink booster pumps can typically add anywhere from 10 to 40 PSI (pounds per square inch) to your existing water pressure, significantly improving flow for individual fixtures. The exact increase depends on the pump’s power and your home’s current water supply.
Are under-sink booster pumps noisy?
Modern under-sink booster pumps are designed to be relatively quiet, especially compared to older models or whole-house pumps. Look for models with noise reduction features, anti-vibration pads, and proper mounting to minimize operational sound within your cabinet.
Do I need a pressure tank for an under-sink booster pump?
Many compact under-sink booster pumps have integrated pressure sensors and switches that eliminate the need for a separate, large pressure tank. However, some models might benefit from a small, inline expansion tank to prevent rapid cycling and reduce wear. Always check the manufacturer’s recommendations.
How long do under-sink booster pumps last?
With proper installation and regular maintenance, an under-sink booster pump can last anywhere from 5 to 10 years. Factors like water quality, frequency of use, and adherence to maintenance schedules can influence its lifespan.
Can I install an under-sink booster pump myself?
Yes, installing an under-sink booster pump is often a manageable DIY project for those with basic plumbing knowledge. However, always follow the manufacturer’s instructions and local codes, and consider hiring a professional for electrical connections or if you’re unsure about any plumbing steps.