Is your once-powerful kitchen faucet now sputtering a weak stream? Does your bathroom sink barely dribble water, leaving you frustrated? A clogged faucet aerator is often the sneaky culprit behind these common household plumbing woes. Fortunately, restoring your water flow to its former glory can be a simple, DIY task, and all you need is a common household item: white vinegar. As a technician with over a decade of experience in kitchen appliances, particularly high-pressure faucets, I’ve seen firsthand how effectively a routine cleaning can transform a struggling water stream. This guide will walk you through the entire process, ensuring your faucets are running smoothly and efficiently in no time.
What is a Faucet Aerator and Why Does it Clog?
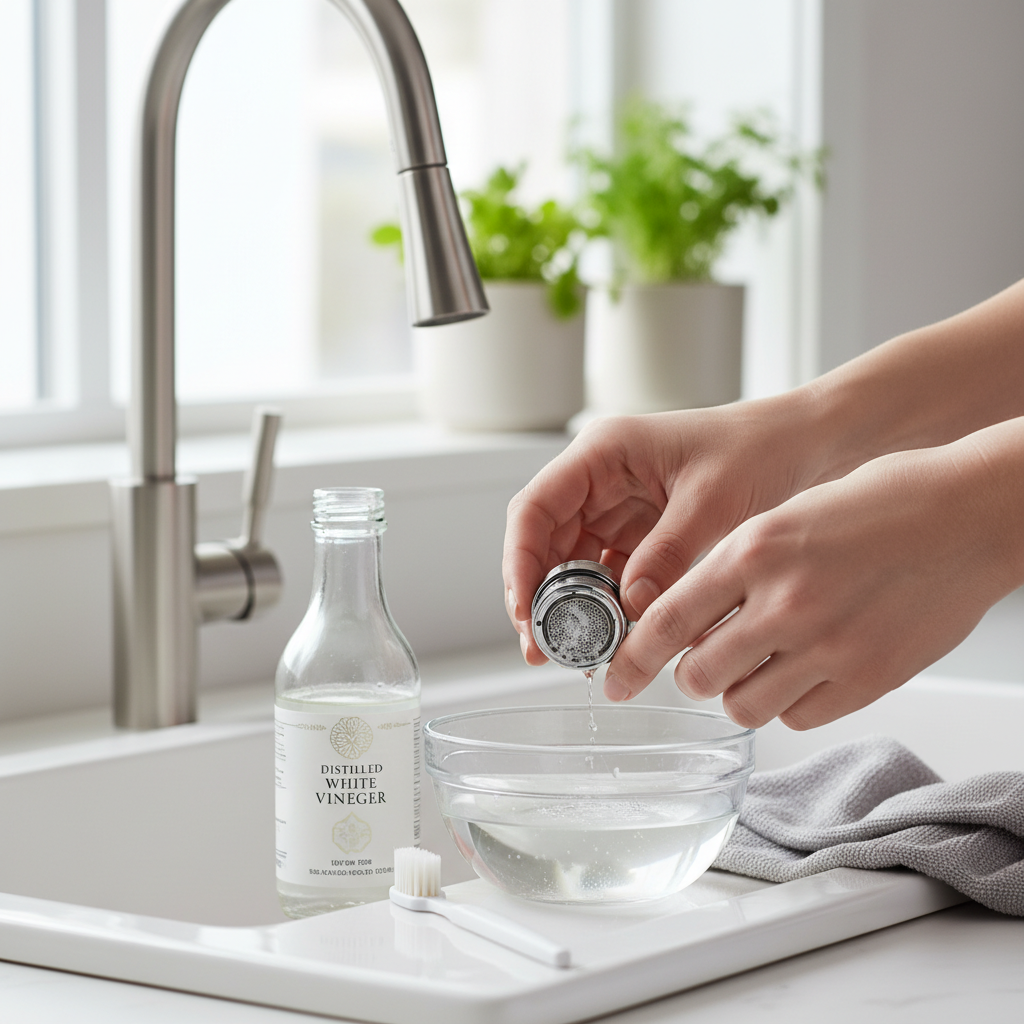
Before diving into the cleaning process, it’s helpful to understand what a faucet aerator is and its crucial role in your daily water use. The aerator is that small, usually coin-sized, mesh screen found at the tip of most indoor faucets. Its primary functions are ingenious: it mixes air into the water stream, making the flow feel softer and less splashy, and it helps conserve water by reducing the overall volume dispensed without sacrificing pressure sensation. It acts like a tiny filter, catching debris before it enters your glass.
Over time, this unsung hero can become a collection point for various impurities, leading to frustrating clogs. The most common offender is mineral buildup, often referred to as limescale. If you live in an area with hard water, minerals like calcium and magnesium naturally present in your water supply can solidify and accumulate on the aerator’s mesh screen. Beyond mineral deposits, sediment, rust flakes from aging pipes, or even dirt can find their way into the aerator, contributing to the blockage. You’ll know your aerator is crying out for attention if you notice low water pressure, an uneven or erratic spray, sputtering noises, or visible white or greenish crust around the spout.
Why White Vinegar is Your Go-To Cleaning Solution
When it comes to tackling mineral buildup, white vinegar is an absolute powerhouse. This natural, inexpensive, and readily available liquid contains acetic acid, which is highly effective at dissolving the alkaline mineral deposits that commonly clog aerators. Unlike harsh chemical cleaners, white vinegar is generally safe for most faucet finishes and is environmentally friendly, making it a preferred choice for household cleaning. Its gentle yet potent action breaks down limescale, making it easy to scrub away the grime that’s restricting your water flow. By harnessing the power of vinegar, you can restore your faucet’s performance without resorting to expensive replacement parts or calling a plumber for a simple fix.
Step-by-Step Guide: Cleaning Your Faucet Aerator with Vinegar
Cleaning your faucet aerator with vinegar is a straightforward process that requires minimal tools and effort. Follow these steps to get your water flowing freely again:
Preparation: Gather Your Tools
Before you begin, gather the following items:
- White vinegar
- Small bowl or a plastic bag (e.g., a sandwich bag)
- Old toothbrush or a small scrubbing brush
- Soft cloth or rag
- Pliers (only if the aerator is stuck)
- Paper towel or a clean cloth
|
Our Picks for the Best High pressure faucet in 2026
As an Amazon Associate I earn from qualifying purchases.
|
||
| Num | Product | Action |
|---|---|---|
| 1 | Inchant Outdoor Kitchen Sink Faucet - 360° Rotatable Single Hole Single Handle Cold Water Kitchen Faucet Flexible Neck Laundry Room Tap Bar Garden Outdoor Faucet, Deck Mount Chrome Finish |

|
| 2 | TMOK 1/2" x 3/4" Brass Outdoor Faucet & High Pressure Jet Nozzle with Leakproof Shut Off Valve, Heavy-Duty Brass 3/4" GHT Hose Nozzle with 4 Garden Hose Rubber Washers, Teflon Tape |
|
| 3 | TIORIY Kitchen Faucet Head with 15 Adapters, High Pressure 3 Functions Pull Down Kitchen Spray Head Replacement, Pull Out Kitchen Sink Sprayer Nozzle, Brushed Gold, ABS |
|
| 4 | 2PCS 360 Degree Swivel Faucet Aerator Deluxe Water Saving Faucet Sprayer Water Saving Bubbler Pressurized Faucet Filter Kitchen Accessories (360 Degree, Count, 2) |
|
| 5 | Chrome Brass Wall Mount Faucet, Single Cold Water Utility Tap, G 1/2 Inch Connection for Laundry Sink, Mop Basin, Garage, Outdoor Garden Hose |
|
| 6 | FORIOUS Kitchen Faucets with Pull Down Sprayer, Brushed Nickel, High Arc Single Handle Classic Stainless Steel Sink Faucet 1 or 3 Hole, Suitable for Farmhouse Camper Laundry Rv Bar |
|
| 7 | AIMADI Kitchen Faucet with Pull Down Sprayer,Commercial Stainless Steel Pull Down Sprayer Kitchen Faucet Single Hole Single Handle RV Laundry Outdoor Kitchen Sink Faucets |
|
| 8 | GIMILI Kitchen Faucet with Pull Down Sprayer Single Handle High Pressure Kitchen Sink Faucet Commercial Double-Headed Stainless Steel Kitchen Faucets Brushed Nickel and Black |
|
| 9 | 3-Adjustable Water Pressure Faucet with Booster Shower Heads - ABS Material, Extended Spout, Anti-Splash, Universal Connector |
|
| 10 | Kitchen Faucet with Pull Down Sprayer, High Arc Single Handle Brushed Nickel Stainless Steel 1 or 3 Hole Faucet for Kitchen Sink, Farmhouse, RV, Laundry, Bar, Outdoor |
|
Step 1: Turn Off Water Supply (Optional but Recommended)
While not always strictly necessary for aerator cleaning, turning off the hot and cold water supply valves under the sink is a good practice, especially if you anticipate any difficulty removing the aerator or if you want to avoid accidental sprays.
Step 2: Remove the Aerator
Most aerators simply unscrew from the tip of the faucet counter-clockwise. You should be able to do this by hand. If it’s too tight or hasn’t been removed in a while, wrap the aerator with a soft cloth or rag to protect its finish, then gently grip it with pliers and twist counter-clockwise. Once loosened, you can typically finish unscrewing it by hand.
Step 3: Disassemble the Aerator Components
A faucet aerator isn’t just one solid piece. It usually consists of several small components: the outer metal housing, rubber washers, and one or more mesh screens or flow restrictors. Carefully separate these pieces. It’s a good idea to lay them out in the order you removed them or even take a quick photo with your phone. This will make reassembly much easier and prevent any mix-ups. Also, be mindful of the small rubber washer, which is essential for a watertight seal.
Step 4: Soak in White Vinegar
Now for the star of the show: white vinegar.
- For removable aerators: Place all the disassembled components into a small bowl. Pour enough white vinegar into the bowl to completely submerge all the parts. Let them soak for at least 30 minutes. For heavily clogged aerators or stubborn mineral buildup, you can extend the soaking time to several hours, or even overnight. You might observe a slight fizzing action as the vinegar works to dissolve the deposits.
- For non-removable aerators (or if you prefer this method): If your aerator is too difficult to remove or you simply prefer not to, you can clean it in place. Fill a plastic bag with white vinegar and carefully position it over the faucet spout so that the aerator is fully submerged in the vinegar. Secure the bag tightly around the faucet neck with a rubber band or string to prevent leaks. Allow it to soak for at least an hour, or overnight for severe clogs.
Step 5: Scrub Away Stubborn Buildup
After soaking, remove the aerator components from the vinegar. You’ll likely see that much of the mineral buildup has softened or dissolved. Use an old toothbrush or a small brush to gently scrub away any remaining deposits or debris from the mesh screens and other parts. For tiny, stubborn particles caught in the mesh, a sewing needle or toothpick can be used carefully to dislodge them.
Step 6: Rinse Thoroughly
Rinse all the aerator components thoroughly under clean running water. Ensure all traces of vinegar and loosened debris are washed away. You can hold the mesh screen under the water to verify that water now flows freely through it.
Step 7: Reassemble and Reattach
Carefully reassemble the aerator components in the correct order, referring to your earlier layout or photo if needed. Make sure the rubber washer is properly seated to prevent leaks. Screw the assembled aerator back onto the faucet spout, tightening it by hand until snug. Avoid overtightening, as this can damage the aerator or the faucet threads. If you used pliers to remove it, you can use them again, but very gently and with a cloth, just for a final quarter-turn if needed, taking care not to scratch the finish.
Step 8: Test for Optimal Flow
Finally, turn the water supply back on (if you turned it off in Step 1). Turn on your faucet and observe the water flow. You should notice a significant improvement: a strong, even, and consistent stream of water. Check for any leaks around the aerator’s connection point. If there’s a leak, gently tighten the aerator a little more.
When to Clean Your Faucet Aerator (and How Often)
Regular maintenance is key to preventing future clogs and ensuring optimal water flow. For most households, cleaning your faucet aerator every 3 to 6 months is a good general guideline. However, certain factors may necessitate more frequent attention:
- Hard Water Areas: If you live in an area known for hard water, mineral buildup can occur much faster. In such cases, a monthly or bi-monthly cleaning might be beneficial.
- Visible Issues: If you start noticing signs of clogging like reduced pressure or an uneven spray before the 3-month mark, don’t wait—clean it right away.
- Plumbing Work: After any plumbing repairs or disturbances to your main water line, it’s wise to check and clean your aerators, as dislodged sediment can travel through the pipes.
Consistent cleaning not only maintains excellent water pressure but also extends the life of your faucet and helps ensure the water coming out of your tap is free of sediment and impurities.
Troubleshooting and Advanced Tips
Even after a thorough cleaning, sometimes issues persist. If your faucet aerator is still causing problems, here are a few things to consider:
- Check for Damage: Inspect the aerator components for any cracks, tears in the mesh, or warped washers. If parts are damaged, a simple cleaning might not suffice, and it’s likely time for a replacement. Faucet aerators are generally inexpensive and widely available at hardware stores.
- Deeper Plumbing Issues: If replacing the aerator doesn’t solve the problem, the low water pressure or clog might stem from a deeper issue within your plumbing system, such as blockages in the pipes or a problem with your main water supply. In these instances, consulting a professional plumber is advisable.
- Prevention: To minimize future clogs, consider installing a whole-home water filtration system or a water softener, especially if you have very hard water. These systems can significantly reduce the mineral and sediment content in your water, protecting all your plumbing fixtures.
“Many people overlook the faucet aerator, yet it’s often the simplest fix for low water pressure. A quick vinegar soak can save you from unnecessary plumbing calls and costly replacements.”
Conclusion
A clean faucet aerator is essential for a healthy and efficient water system in your home. By understanding its function and knowing how to effectively clean it with white vinegar, you can easily tackle common issues like low water pressure and uneven sprays. This simple, natural, and cost-effective maintenance task, performed every few months, will ensure your faucets deliver a consistent, clean stream of water, enhancing your daily comfort and potentially extending the life of your fixtures. Don’t let a clogged aerator dampen your spirits; embrace the power of vinegar and enjoy the steady flow you deserve. What improvements have you noticed after giving your aerators a good clean?
Frequently Asked Questions
Can I clean an aerator without removing it?
Yes, you can. By filling a plastic bag with white vinegar and securing it around the faucet spout so the aerator is fully submerged, you can effectively clean it in place. Let it soak for several hours or overnight before removing the bag and scrubbing any remaining residue.
How long should I soak an aerator in vinegar?
For typical mineral buildup, soaking for at least 30 minutes is usually sufficient. For more severe clogs, you can extend the soaking time to several hours or even overnight (8-12 hours) to allow the vinegar to fully dissolve the deposits.
What if my aerator is still clogged after cleaning?
If cleaning doesn’t resolve the issue, inspect the aerator for damage to its components, such as torn mesh screens or worn washers. If damaged, replacement is the best option. If a new aerator also doesn’t fix the problem, the clog might be deeper in your plumbing system, requiring professional attention.
What type of vinegar should I use?
Standard white distilled vinegar is ideal for cleaning faucet aerators. Its acetic acid content is perfect for dissolving mineral deposits and limescale without damaging most faucet materials. Avoid using apple cider vinegar or other types, as they may contain sugars or colorings that could leave residues.
Can cleaning an aerator improve water pressure?
Absolutely! Cleaning a clogged faucet aerator is one of the quickest and most effective ways to restore low water pressure and achieve a strong, consistent water flow. The buildup of minerals and debris directly restricts water passage, and removing these blockages immediately improves pressure.