Experiencing frustratingly low water pressure from your faucet? You’re not alone. Many homeowners find their daily tasks, from washing dishes to filling a glass of water, slowed down by a weak stream. Often, the culprit is a small, unassuming device known as a flow restrictor. While designed with good intentions, these restrictors can sometimes hinder rather than help, especially in homes already battling low water pressure or with older plumbing systems. If you’re ready to take matters into your own hands and restore your faucet’s full potential, this DIY guide will walk you through the process of removing a flow restrictor, offering clear steps, essential considerations, and expert tips.
What Are Faucet Flow Restrictors?
Faucet flow restrictors are small inserts, typically made of plastic or rubber, built into your faucet’s spout or aerator. Their primary purpose is to limit the volume of water flowing through the faucet per minute, thereby promoting water conservation and reducing energy consumption associated with heating water. Since 1994, federal regulations in the United States have mandated that all new faucets include these water-saving devices.
These components work by narrowing the passageway for water, creating resistance that reduces the flow rate. While this contributes to environmental efforts and lower utility bills, it can also lead to a noticeably weaker stream, particularly in areas with naturally low water pressure or if the restrictor becomes clogged.
Why Consider Removing a Flow Restrictor?
The most common reason homeowners choose to remove a faucet flow restrictor is to address low water pressure. A weak flow can make simple tasks inefficient and irritating. Removing the restrictor can significantly boost the water output, providing a stronger stream that fills sinks and pots faster and improves overall usability.
Another frequent issue is a clogged flow restrictor. Over time, mineral deposits from hard water or sediment from your plumbing system can accumulate within the tiny openings of the restrictor or aerator screen. This buildup further impedes water flow, causing pressure to drop and the stream to become erratic or sputter. In such cases, cleaning the restrictor is often sufficient, but if the issue persists or the restrictor is damaged, removal might be the best solution.
Potential Downsides and Important Considerations Before You Start
Before you grab your tools, it’s crucial to understand the implications of removing a flow restrictor. While it can enhance your water flow, there are several factors to weigh.
Legal and Environmental Implications
|
Our Picks for the Best High pressure faucet in 2026
As an Amazon Associate I earn from qualifying purchases.
|
||
| Num | Product | Action |
|---|---|---|
| 1 | Kitchen Faucet with Pull Down Sprayer, High Arc Single Handle Brushed Nickel Stainless Steel 1 or 3 Hole Faucet for Kitchen Sink, Farmhouse, RV, Laundry, Bar, Outdoor |

|
| 2 | 3-Adjustable Water Pressure Faucet with Booster Shower Heads - ABS Material, Extended Spout, Anti-Splash, Universal Connector |
|
| 3 | GIMILI Kitchen Faucet with Pull Down Sprayer Single Handle High Pressure Kitchen Sink Faucet Commercial Double-Headed Stainless Steel Kitchen Faucets Brushed Nickel and Black |
|
| 4 | FORIOUS Kitchen Faucets with Pull Down Sprayer, Brushed Nickel, High Arc Single Handle Classic Stainless Steel Sink Faucet 1 or 3 Hole, Suitable for Farmhouse Camper Laundry Rv Bar |
|
| 5 | 2PCS 360 Degree Swivel Faucet Aerator Deluxe Water Saving Faucet Sprayer Water Saving Bubbler Pressurized Faucet Filter Kitchen Accessories (360 Degree, Count, 2) |
|
| 6 | TIORIY Kitchen Faucet Head with 15 Adapters, High Pressure 3 Functions Pull Down Kitchen Spray Head Replacement, Pull Out Kitchen Sink Sprayer Nozzle, Brushed Gold, ABS |
|
| 7 | Chrome Brass Wall Mount Faucet, Single Cold Water Utility Tap, G 1/2 Inch Connection for Laundry Sink, Mop Basin, Garage, Outdoor Garden Hose |
|
| 8 | Inchant Outdoor Kitchen Sink Faucet - 360° Rotatable Single Hole Single Handle Cold Water Kitchen Faucet Flexible Neck Laundry Room Tap Bar Garden Outdoor Faucet, Deck Mount Chrome Finish |
|
| 9 | AIMADI Kitchen Faucet with Pull Down Sprayer,Commercial Stainless Steel Pull Down Sprayer Kitchen Faucet Single Hole Single Handle RV Laundry Outdoor Kitchen Sink Faucets |
|
| 10 | TMOK 1/2" x 3/4" Brass Outdoor Faucet & High Pressure Jet Nozzle with Leakproof Shut Off Valve, Heavy-Duty Brass 3/4" GHT Hose Nozzle with 4 Garden Hose Rubber Washers, Teflon Tape |
|
In some regions, removing flow restrictors, especially from showerheads, may technically violate water conservation regulations, such as the US Energy Policy Act of 1992 which sets a maximum flow rate of 2.5 gallons per minute (GPM) for showerheads. Regulations can vary by state and local municipality, so it’s advisable to check local codes regarding water conservation devices. While enforcement for individual homeowners is rare, being aware of these guidelines is important.
Environmentally, permanently removing a flow restrictor will lead to increased water consumption and potentially higher utility bills, especially if you heat your water. The devices are, after all, designed to save resources.
Warranty Voidance and Faucet Performance
Many faucet manufacturers state that altering or permanently removing the flow restrictor can void the product’s warranty, particularly concerning the restrictor’s assembly and function. This means if you encounter issues with your faucet after removal, the manufacturer may not cover repairs or replacements.
Beyond warranty concerns, removing the restrictor can sometimes lead to undesirable effects such as excessive splashing, a chaotic water stream, or even internal damage from increased pressure or debris. Often, cleaning a clogged restrictor or replacing it with a new one that allows for a higher GPM is a recommended alternative to complete removal, as it can often resolve low pressure issues without the downsides.
“While the temptation to remove a flow restrictor for better pressure is strong, understanding local regulations and potential warranty impacts is key. Often, a thorough cleaning or a simple replacement with a higher-flow aerator can offer the desired improvement without any significant drawbacks.” – Alex Johnson, Master Plumber with 15 years of experience.
Tools You’ll Need for the Job
Most flow restrictor removal tasks are straightforward and require only basic household tools:
- Adjustable Wrench (Crescent Wrench): Essential for loosening stubborn aerators or faucet heads.
- Rubber Band or Cloth: To protect the faucet’s finish from scratches when using a wrench.
- Needle-Nose Pliers: Useful for grasping and removing small, hard-to-reach restrictor pieces.
- Flathead Screwdriver: Can be used to gently pry out the restrictor or O-rings.
- Allen Wrench/Key Set: Some modern faucets, particularly those with internal restrictors (like certain Kohler models), may require a specific Allen key to access the mechanism.
- X-Acto Knife or Thin Blade: To carefully lift plastic caps that might conceal Allen screws.
- Small Pick or Paperclip: Handy for prying up delicate O-rings without damage.
- Towel: To plug the sink drain and catch any small parts.
Always prioritize safety by turning off the water supply to the faucet before you begin any work.
Step-by-Step Guide: How to Remove a Flow Restrictor from Your Faucet
The process varies slightly depending on where the flow restrictor is located. Most commonly, it’s found within the aerator.
1. Preparation is Key
- Turn off the water: Locate the hot and cold water shut-off valves under your sink and turn them clockwise until they are completely off. This prevents unexpected water flow during the process.
- Plug the drain: Place a towel or a sink stopper in the drain. Small parts can easily fall and get lost, so this step is crucial.
- Gather your tools: Have all necessary tools within reach.
2. Accessing the Restrictor
Method 1: Aerator Removal (Most Common)
The aerator is the small screen cap at the very end of your faucet spout.
- Unscrew the aerator: Most aerators can be unscrewed by hand by turning them counter-clockwise. If it’s too tight or stuck due to mineral buildup, wrap a cloth or thick rubber band around it and use an adjustable wrench for leverage. Be gentle to avoid damaging the finish.
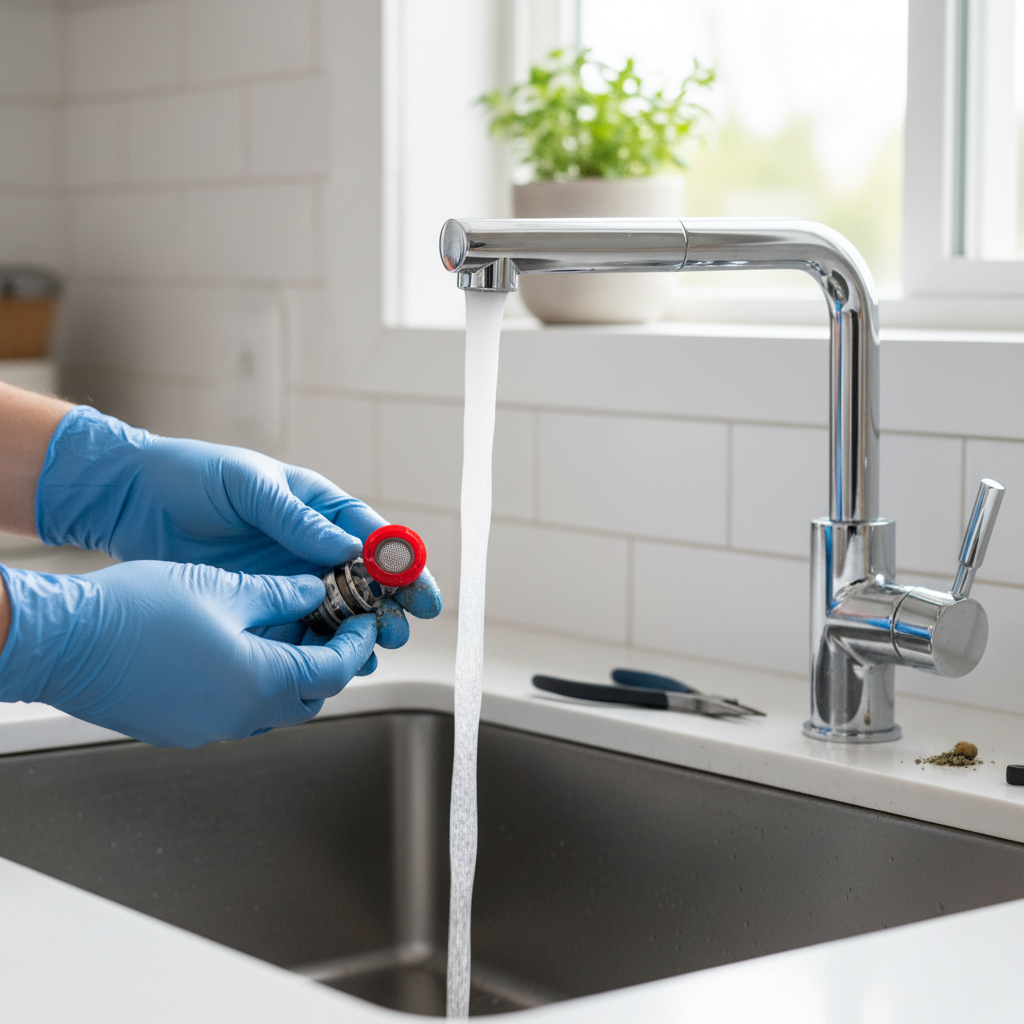
- Disassemble aerator components: Once removed, you’ll typically find several small parts: a washer, a mesh screen, and then the flow restrictor itself. Lay them out in the order you remove them, as this will simplify reassembly. The flow restrictor often looks like a small plastic disc, sometimes star-shaped, located behind the screen.
Method 2: Faucet Head/Body Restrictor (Less Common)
Some faucets have a restrictor deeper within the faucet head or body, not just in the aerator.
- Protect the faucet head: If you need to remove the entire faucet head, wrap it with a thick cloth or rubber band to prevent scratching the finish.
- Loosen the faucet head: Use an adjustable wrench to carefully loosen and remove the faucet head.
- Specific Faucets (e.g., Kohler): For some models, you might need to remove the faucet handle first. Look for a small plastic cap or plug that conceals an Allen screw (often on the front or side of the handle base). Use an X-Acto knife to carefully pry off the cap, then use the appropriate size Allen wrench to loosen the screw and remove the handle. This grants access to the internal components where the restrictor might be.
3. Locate and Remove the Flow Restrictor
- Identify the restrictor: This will be the piece designed to limit water flow. In an aerator, it’s usually a colored plastic disc or a small insert with a restricted opening. In a faucet head, it might be a star-shaped plastic piece or a cylindrical insert.
- Gently remove: Use your fingers, needle-nose pliers, or a small flathead screwdriver to carefully pry or pull the flow restrictor out. Be careful not to damage other components like rubber gaskets or O-rings. If the restrictor is just clogged, you might see mineral deposits or debris on it.
- Clean any debris: While the parts are disassembled, take the opportunity to clean any sediment or mineral buildup from the aerator screen and other components. You can soak them in vinegar for a few hours for a thorough cleaning.
4. Reassembly
- Reverse the steps: Carefully place all components back in the reverse order of their removal. Ensure all washers and gaskets are properly seated to prevent leaks.
- Tighten carefully: Hand-tighten the aerator or faucet head first. If using a wrench, turn it gently until snug, avoiding overtightening which can damage threads or finishes.
- Test the water flow: Once everything is reassembled, slowly turn the hot and cold water supply valves back on. Turn on the faucet and check the water pressure and for any leaks. Enjoy your newly improved water flow!
Maintaining Optimal Faucet Performance
Even after removing a flow restrictor, regular maintenance is crucial to prevent future low water pressure issues.
- Regular Cleaning: Periodically unscrew and clean your aerators. Sediment and mineral deposits can still build up on the screens, even without the restrictor.
- Check for Leaks: Keep an eye out for any drips or leaks around the faucet, which can indicate issues with seals or improper reassembly.
- Monitor Water Pressure: If low water pressure returns, it might indicate a different underlying plumbing problem that requires further investigation or professional assistance.
Conclusion
Successfully removing a faucet flow restrictor can significantly enhance your home’s water pressure and improve your daily experience. While the process is generally straightforward for DIY enthusiasts, it’s essential to proceed with caution, understand the potential legal and warranty implications, and gather the right tools. By following these steps, you can restore a robust flow to your faucets, transforming a once-frustrating chore into a satisfying task.
Remember, if you encounter any difficulties or suspect a more complex plumbing issue, don’t hesitate to consult a professional. What unexpected benefits have you noticed after improving your faucet’s water pressure?
Frequently Asked Questions
Is it legal to remove a flow restrictor from my faucet?
While federal and some local regulations exist for water conservation, especially concerning showerheads, individual enforcement for faucet flow restrictor removal is uncommon. However, it’s always best to check your local municipal codes to ensure compliance.
Will removing a flow restrictor damage my faucet?
Permanent removal of a flow restrictor can void your faucet’s warranty. Additionally, in rare cases, it might lead to issues like increased splashing or a chaotic water stream if your home’s water pressure is naturally very high. It’s often recommended to clean the restrictor first or replace it with a higher-flow aerator to minimize risks.
How do I know if my low water pressure is due to a flow restrictor?
If you experience good water pressure from other faucets in your home but a specific one has low pressure, the flow restrictor (or a clogged aerator) is a likely culprit. You can test this by removing the aerator completely and checking the flow directly from the spout.
What if I remove the restrictor and still have low pressure?
If removing the flow restrictor doesn’t solve your low water pressure problem, the issue might lie elsewhere. Potential causes include mineral buildup in the faucet body, issues with shut-off valves, problems with your home’s main water supply line, or a faulty pressure regulator for your entire house. In such cases, consulting a plumber is advisable.
Can I put the flow restrictor back in?
Yes, you can typically reinsert the flow restrictor if you change your mind, need to adhere to regulations, or wish to restore water conservation. Simply follow the reassembly steps in reverse order, ensuring the restrictor and any other components are correctly seated.